Getting a high-quality image has become a challenge considering of all the online image sharing platform or the different camera nosotros employ. Noisy and grainy images can ruin the pleasant viewing experience of the audience.
Not everyone gets the chance or requires capturing themselves with professional photographers with professional ready up like celebrities. Just that doesn't hateful that you will piece of work with any depression-resolution photo of yours, right?
Other than not capturing images with a professional camera, you may also become low-resolution or Pixelated photos by resizing them for unlike social media platforms. Images are a combination of small pixels.
Because of that, when we need to zoom and resize them to use on multiple social platforms. In this procedure, the pixels become stretched, and the image gets blurry. In this article, we will learn how to fix a Pixelated image in photoshop.
Using Adobe Photoshop, you can gear up a Pixelated image in two ways. In this article, I will show you both ways so you lot tin can learn both and use them according to your requirements. In the get-go method, we volition work with sharpness and blurriness. So with no delay let's get started,
Adobe Photoshop is the uncontroversial ruler of photos editing, simply information technology requires a great bargain of money to purchase. This program may therefore do so much for your images, that the cost would seem less to yous. Information technology takes only a second to repair Pixelated images, despite a relatively steep gradient for several Photoshop features.
Step 1: Insert your Pixelated image in photoshop.
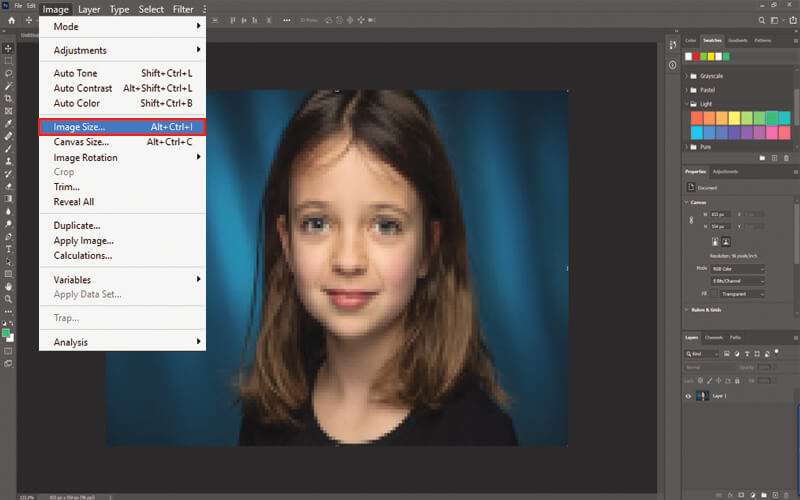
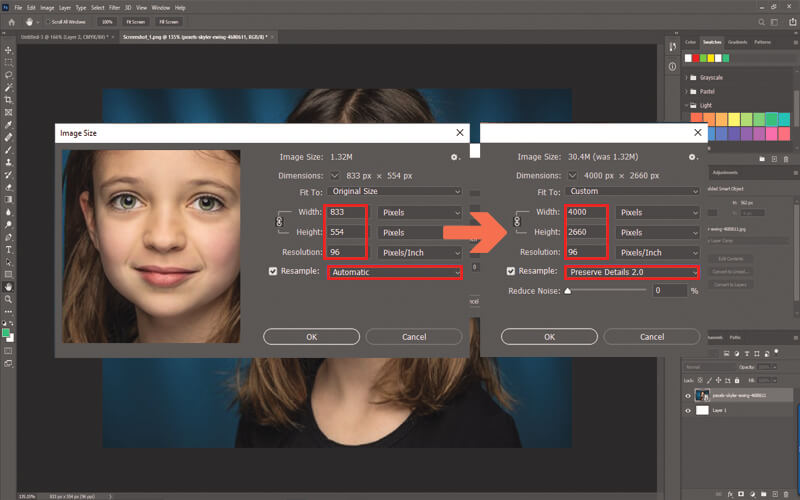
Step two: At present modify the image size by Epitome→ Image Size or you can concord and printing Ctrl+Alt+I. Every bit the Pixelated images are low resolution to edit them we need to increase the image size.
Increasing the epitome size may cause a blurry result. We will work on that later.
Step 3: And then after selecting the image size, a window will pop upwards like the prototype below. Change the size co-ordinate to your image requirement.
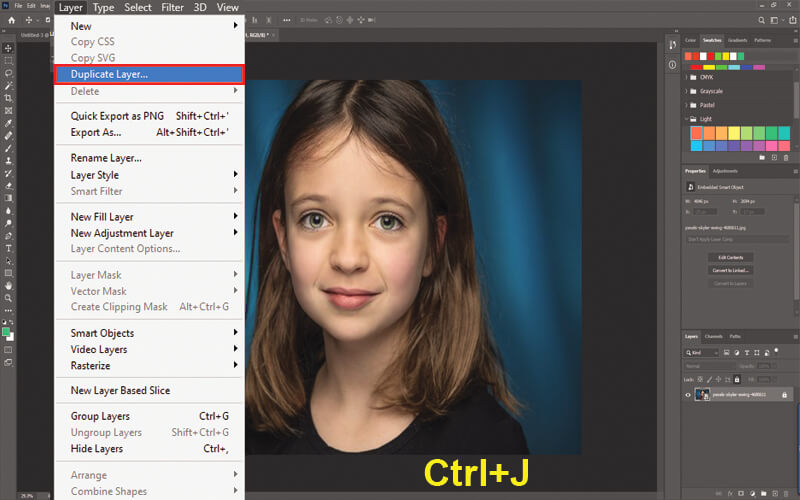
Step 4: Then we demand to create a indistinguishable layer. To practise that, go to Layer→ Duplicate Layer or you can hold and press Ctrl+J.
The reason nosotros create a duplicate layer is if nosotros messed upward in between our editing, our original file remains intact, and nosotros can start once again.
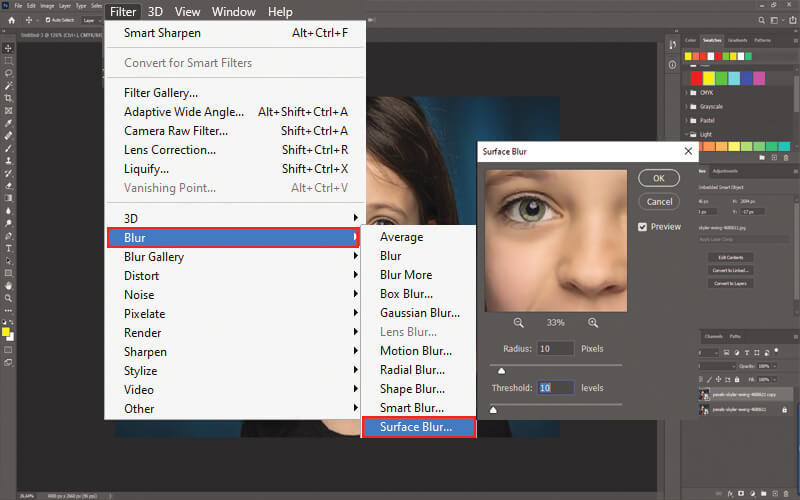
Pace 5: Now select the duplicate layer nosotros have merely created and go to Filter→ Mistiness→ Surface Mistiness . A window will appear and there conform the blur of your image by irresolute the value of Radius and Threshold .
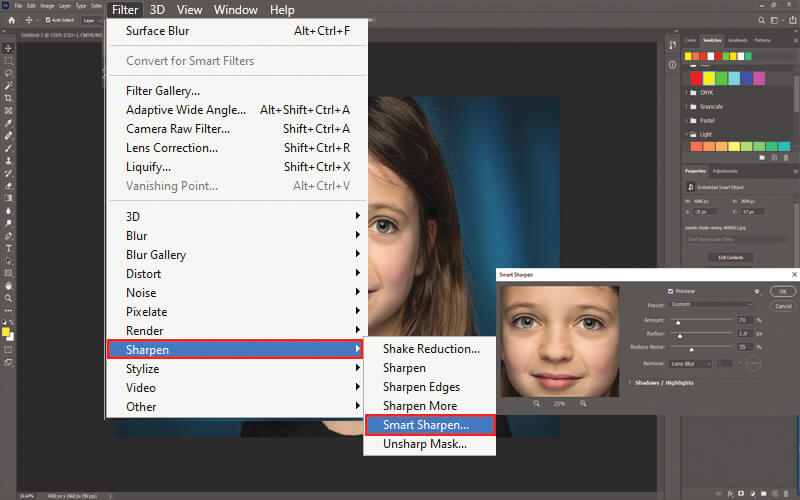
Step 6: After adjusting the blur now, we volition adjust the sharpness. Go to Filter→ Acuminate→ Smart Acuminate . Adapt the sharpness of your prototype using the sliding confined.
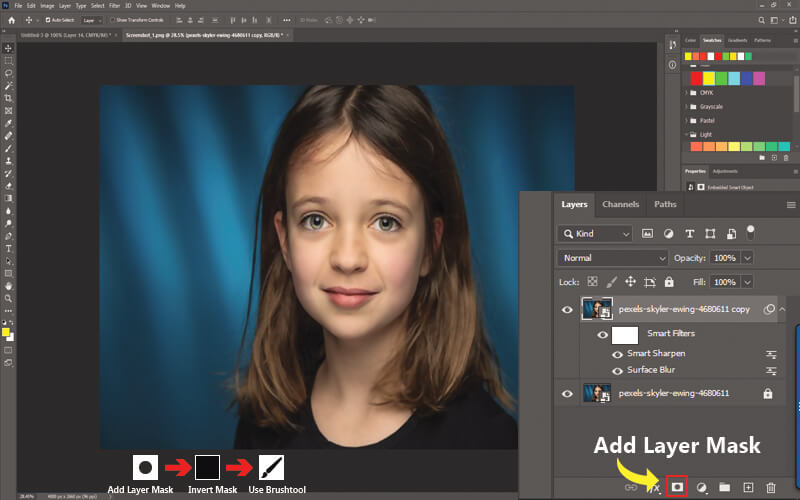
Footstep 7: In the second footstep, nosotros increment the image size, which creates a blurry issue. In this footstep, we will reduce that, and do that we need to add a layer mask to it like below.
Add a layer mask, invert it, and use the brush tool to reduce the blurriness.
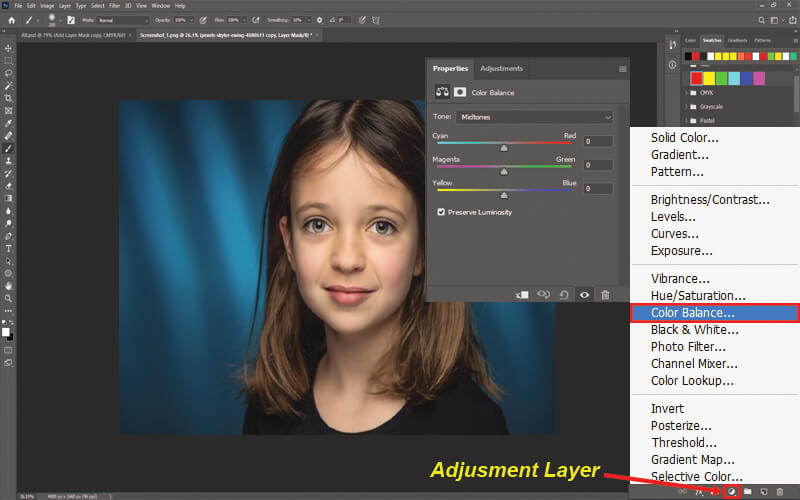
Footstep viii: Now it'southward time to fix the color balance. If your prototype has the exact color you want, then you can skip this step. To fix the color remainder got to Adjustment Layer→ Colour Balance and a window will appear.
Play with the settings until you found the color y'all want. After getting your preferred colour rest, we are done with fixing our Pixelated paradigm.
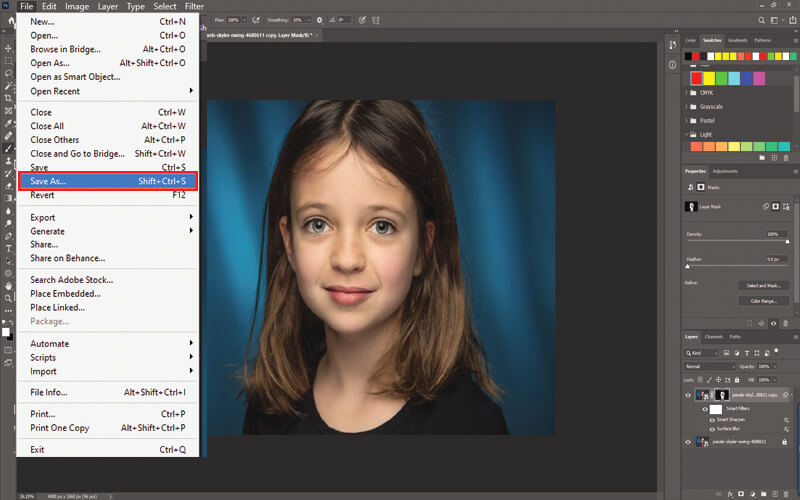
Pace 9: Information technology's time to save it and to practise that, get to File→ Salvage Every bit . Give the file an appropriate name and relieve it wherever you want.
It is almost like to the first ane except in the start method we used the sharpen tool and in this method, we will utilise the noise reduction tool instead of the acuminate tool and "Gaussian Blur" instead of "Surface Blur".
Follow the steps of the previous method until Step iv . After doing all of that, encounter the below steps to move farther.
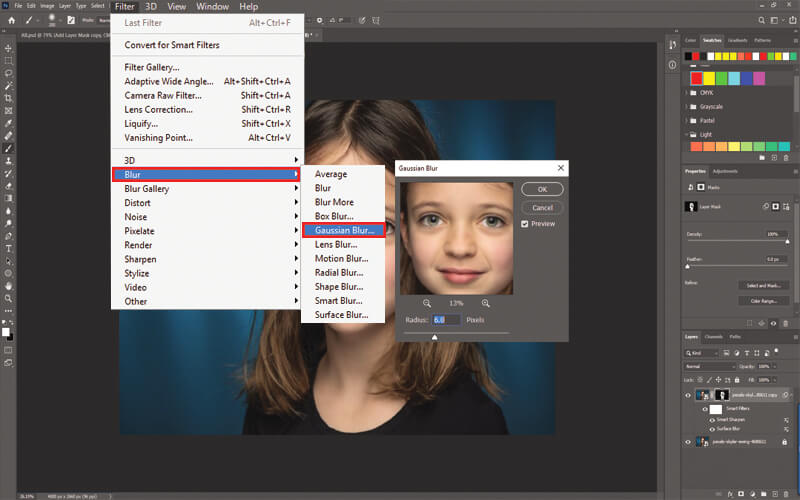
Step 5: If you finish stride 4 of the previous method, so you lot will get a indistinguishable layer of your epitome. At present got to Filter→ Blurr→ Gaussian Blurr . See the prototype below to get an obvious idea.
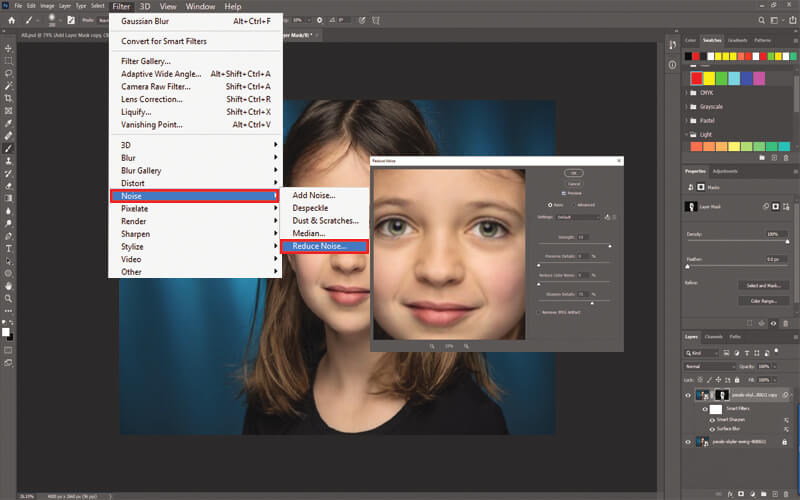
Step 6: Then over again, go to Filter→ Noise→ Despeckle and play with the settings until you go the best consequence for your epitome.
At present again for further editing follow the steps of the previous method from Step vii to Stride ix .
So nosotros have seen two methods of fixing a Pixelated image in photoshop, but which one is meliorate? Well, it depends on your personal interest as people volition employ dissimilar images and few images volition look improve-using method one and few will expect expert with method 2.
Only as a professional epitome editing expert, I would suggest yous go for method i, as most of the images will wait ameliorate using it.
Gratuitous Photoshop Action To Ready The Pixelated Image
We have created a photoshop activeness based on the showtime method, and we are happy to say that we will requite you that for complimentary. But first Permit me give yous an idea of photoshop actions. Photoshop actions are a combination or a set of photoshop editing process that helps y'all to accomplish the desired outcome with just ane click. All you demand to install the photoshop activeness in your Adobe Photoshop CC, click on the play push, and Nail! Your epitome is ready. Download the Photoshop action and first fixing your Pixelated images with just i click. If you don't know how to install a Photoshop activeness, then meet our YouTube video tutorial below.
The settings we used are compatible with our image, and it may not adjust yours properly. In that instance, play with the settings and find the sweet spot for your image.
Pixelated images can ruin your amazingly captured images. Hopefully, later reading this commodity, you learn how to fix a Pixelated image in photoshop. Use our Photoshop actions to set up your low-resolution images with one click.
Bordie Capron
Author
"Bordie Capron is a Sr. Content Maker who is working in The Clipping Path Service an The states-based image and video post-production company for over 7+ years. She completed her degree in graphic designing and worked every bit a graphic designing skillful for several years. She always loved writing"
Source: https://theclippingpathservice.com/how-to-fix-a-pixelated-image-in-photoshop/
Posted by: hayesnothisper.blogspot.com


0 Response to "How To Make Pixelated Image Look Better Photoshop"
Post a Comment