You lot are shooting on a bright sunny day and you are feeling like getting every shot perfect. You come up domicile with a large satisfaction and smile on your confront and you lot upload all your images to your figurer. Just alas! Nigh of the pictures are too brilliant and overexposed.
Well earlier yous get mad, I want to tell yous it's a normal thing. Our eyes tin can process more detail than a photographic camera because we have a brain to procedure things, whatever we see with our eyes. So before y'all think y'all have wasted your fourth dimension, I would like to tell yous, it is possible to fix an overexposed photo in post-processing.
In this article, I will try to explain non only how to ready an overexposed photo but also how y'all can avert capturing overexposed photos.
The reasons for getting an overexposed photo are many. As I already said, our eyes tin procedure much more particular than a camera, so nosotros tin can't capture images by measuring the scene with our eyes. Our optics can differentiate calorie-free and shadow, but our camera tin't.
Another reason to get an overexposed photograph is not measuring the Light Meter correctly. Every professional camera has a built-in calorie-free meter and if yous want to avert overexposure, then you must know how light meters work.
The calorie-free meter settings take three modes and those are Matrix, Centre-Weighted, and Spot Metering. The matrix mode allows you to residuum the full scene and continue the exposure just as much every bit the scene requires.
What if you need to focus on the center? For this purpose, yous can use the eye weighted meter setting. This allows keeping the focus centered and giving your scene a balanced exposure.
Now let'due south talk about the third one: Spot Meter. As the proper name suggests, information technology focuses on a specific spot and provides a balanced exposure where the rest of the images remain as information technology is.
Now that we know how overexposed photos happen, nosotros can move further to solve it.
At that place are several ways to fix an overexposed photo, merely offset, endeavour to learn to command your inbuilt camera settings to control your exposure. Allow's dig into the deep and solve the issue together.
It is ameliorate to fix an overexposed photo while taking the shot rather than in the post-processing. You tin eliminate this problem if you capture the right exposure photo. Effort to capture photos with transmission settings if you don't want to use photoshop to prepare your photos.
While shooting, remember to maintain the light meter settings according to your scene. I have already mentioned the modes of the light meter and when to use the light meter co-ordinate to your scene. Depending on your scene (Calorie-free or Dark) alter your ISO, Aperture, and Shutter Speed.
If you want to do the post-processing no matter what then I would like to teach you a trick. If you want to create the perfect exposure for your image in photoshop, then capture your epitome slightly underexposed. The reason is fixing an underexposed photo in photoshop keeps the detail intact than fixing an overexposure.
Y'all call histogram the brain of a camera that can fix your overexposure trouble hands if you tin read it accurately. Using the histogram, we can sympathise if our paradigm is going to be overexposed or not, how?
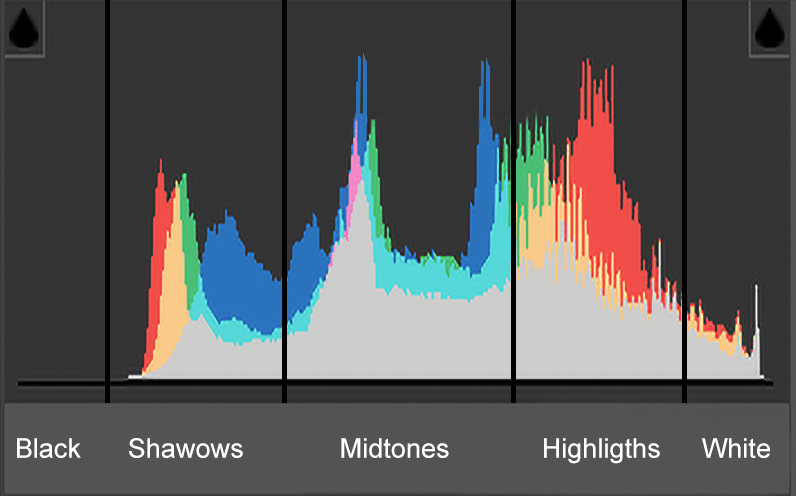
Well, the histogram is like a graph and it has three points: night tones, midtones, and light tones. These points evidence the level of overexposure of a photo, so information technology'due south important for you to read the histogram properly.
If you don't know how to read a histogram in photography, then y'all won't be able to fix the problem. Agreement histograms in photography tin reduce your post-production hassle and perfect exposure photo. Let's become into the histogram and larn nigh it.
The dark tones are further divided into ii parts, and those are "blacks" and "shadows". On the other mitt, light tones are divided into highlights and whites. "Midtones" are but midtones. Now, according to the histogram, when your image will get perfect exposure?
If the histogram is even, then the image has perfect exposure, but if the diagram goes left or correct, and so the image will endure exposure issues. And then try to continue the diagram even to avert overexposure problems.
Now nosotros take talked enough nearly how you can capture photos with a counterbalanced exposure. But what if later on following all of them you still get overexposed photos? Well, so postal service-processing is the only way to fix things up. So let's know how to prepare an overexposed photo in photoshop.
The all-time photoshop tools to ready the exposure are Exposure Slider, Highlights Slider, and Whites Slider.
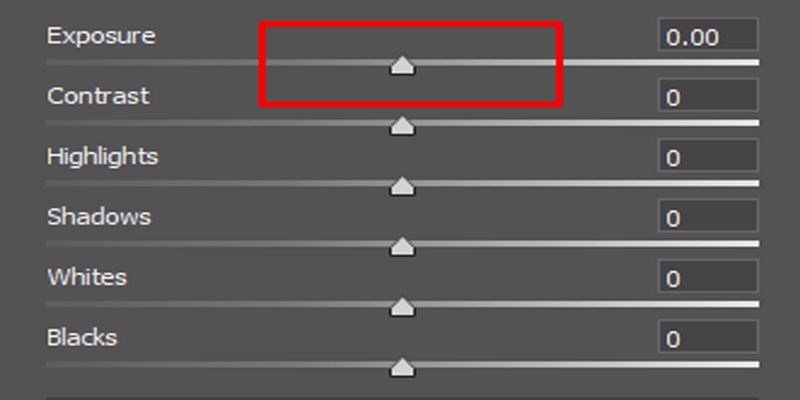
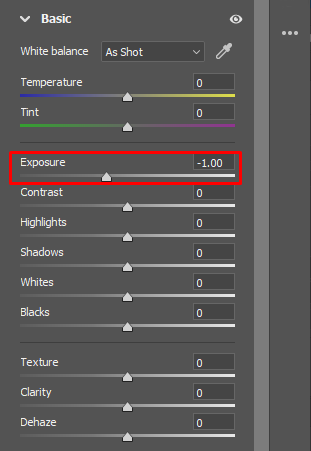
With the exposure slider, y'all can go left/right (-/+) to change the brightness level of the entire image. While sliding you will meet numbers are increasing or decreasing based on which style you are sliding. Slide left or right until you find the remainder.
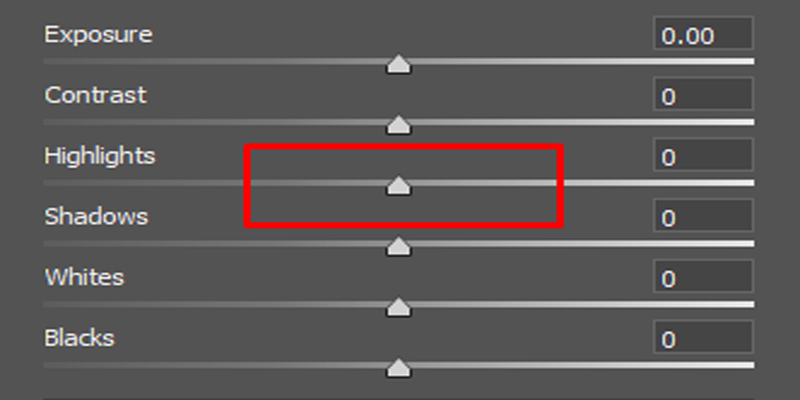
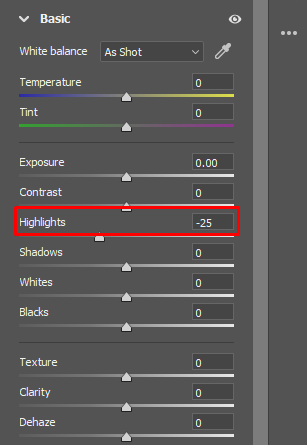
The highlights slider allows you to play with the burnt-out areas of your paradigm. Changing the highlights slider volition change the brightest areas of a photograph. It is useful when you take done playing with all the tools to fix the exposure, but still take few areas that are unaffected.
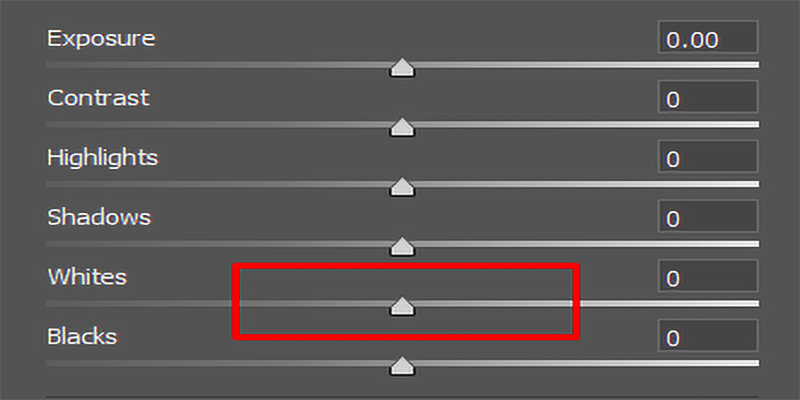
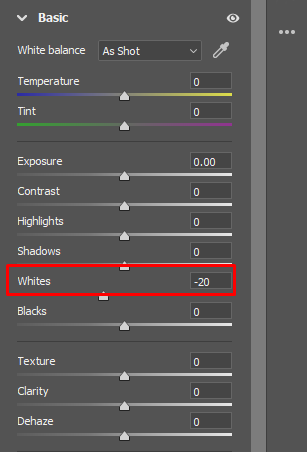
The white slider also works equally the exposure slider, but it changes the overall brightness of a photo along with the midtones. Information technology changes the brightness of the midtones. So when yous increment it by sliding it right, yous increase the brightness of the midtones. And if you slide it left, the midtones brightness volition go down with information technology.
To edit your overexposed epitome in photoshop, you have to insert your image first. Afterwards inserting your image now it'southward time to play with the sliders. The exposure slider works globally and the other two works locally.
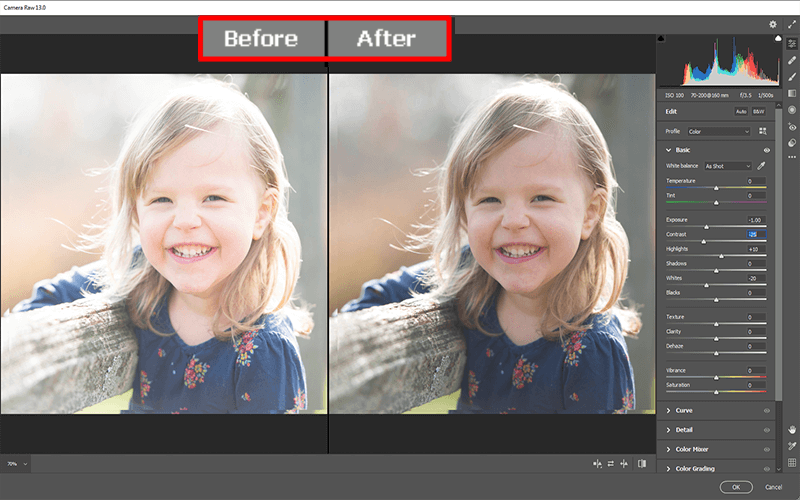
That means when you lot modify the exposure slider it will affect the whole image and for the other ii, the changes will cover a precise area or color. You can piece of work however you like, but if yous ask me, I would advise you work globally first and then locally. I will exist using the image below for today's photoshop tutorial.
Then for this prototype, I will alter the exposure slider offset. The changes I am going to make are based on my paradigm. You guys can play a bit with the slider to find out what works for your epitome. For my prototype, the exposure that works for me is -1.00.
After changing the exposure slider, now I will change the whites slider to fix the effulgence of the midtones. As the overexposed photo has excessive calorie-free, I will slide left and the brightness will go down. For my image, the brightness is -twenty.
At this phase, your prototype volition get well-nigh perfect exposure, just like mine, simply the work is non over still. There will be a couple of areas, Where I need to work on the highlights. I volition slide the highlights slider down a bit and then that the brighter areas get darker. For my image, the highlights that piece of work for me are -25.
And my editing is washed for this paradigm. Yous can see the before/after epitome below and see the difference for yourself.
Not only photography beginners but also professional photographers struggle with overexposed photos sometimes. The worst role of getting overexposed photos is when yous are done with shooting and then transfer them to your computer at the end of the day.
That's why I would suggest you ever keep your optics on the photographic camera settings and give time to your every shot. If all of that doesn't work, then mail service-processing is always possible at your fingertips. Learn how to set up an overexposed photograph so that you never confront difficulties with it in the futurity.
Navaho Mizsey
Author
"Navaho Mizsey is a Content Author Executive with 5+ years of experience. He is a hardworking and talented writer. He writes what the audience wants to read. He completed his degree in journalism and started his career in content writing. He loves to write about photography, camera, and photographer"
Source: https://theclippingpathservice.com/how-to-fix-an-overexposed-photo/
Posted by: hayesnothisper.blogspot.com


0 Response to "How To Fix Washed Out Photos In Photoshop"
Post a Comment